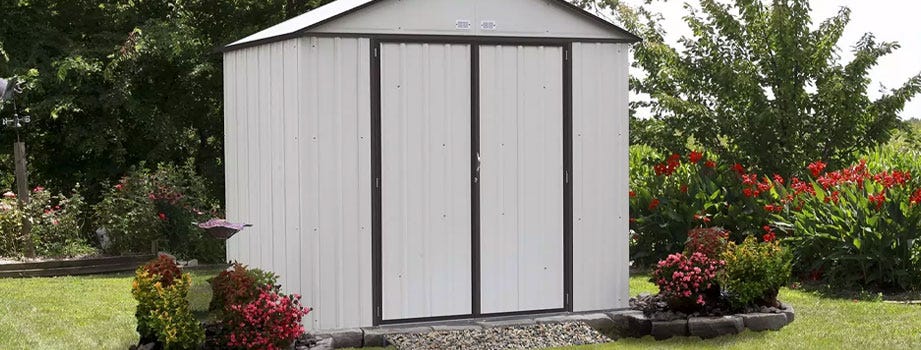
Before You Begin
Preparation is key to a successful shed selection and assembly. Check Zoning and Building Regulations: Check local building codes regarding footings, location, severe-weather preparedness, and other requirements. Also, confirm that sheds are permitted with homeowners’ or community associations, or your landlord, if applicable.
Read All Your Assembly Instructions: Thoroughly read through the instruction manual, which can be found inside the hardware bag.
Need Additional Help? Check Out Our Manuals Library: Manuals are also available on this Web site. To view or download a manual, you will need your model number located on a white sticker on the gable section inside your building. DO NOT REMOVE THIS STICKER. Write this number down, as you also will need it to register your product online or to provide to Arrow Customer Service, in the event you need to contact a representative.
Prep For Assembly
Lay Out All Parts: Be sure that your Arrow shed kit is complete. Lay out all the pieces on a tarp for easy viewing and familiarize yourself with the hardware and fasteners. This will make assembly easier.
Note that all shed parts are numbered and pre-drilled for easy assembly. But if a part is missing or damaged, please fill out a Customer Service web form. Or, if you prefer, contact our Customer Service department by email at assist@arrowsheds.com or call us at 1-800-851-1085.
Check the Weather Forecast: While not always accurate, it can help you determine the best time for assembly. It is important to assemble on a calm day(s) when no wind or rain is anticipated.
Don’t Assemble Alone: Have at least one other person lined up to work with you so that one of you can do the fastening and the other can do the positioning and holding of panels. Make sure that you both have set aside the required time and be clear on each participant’s role.

Prepare Your Base
Whether your base is dirt, concrete, crushed gravel, wood or patio blocks, it MUST be square and level. Consider using an Arrow base kit (available for the majority of Arrow sheds), which is self-squaring. For more information, review our more detailed Arrow Shed Preparation and Assembly Checklist.

Control Condensation
Provide a well-drained base, such as crushed rock or gravel to help prevent moisture from permeating into the shed through the base.
Provide for adequate ground water drainage away from the shed’s base.
Divert rain and melting snow accumulations away from the shed’s base.
Install a continuous unbroken plastic vapor barrier with a thickness of 6 mil., such as a plastic sheet (purchased separately), between exposed ground surface and the building’s base.
For more tips on controlling condensation and choosing a location for assembly, check out our Arrow Shed Preparation and Assembly Checklist.
Flooring & Anchoring
The instruction manual outlines options for constructing a level, square base for your shed.
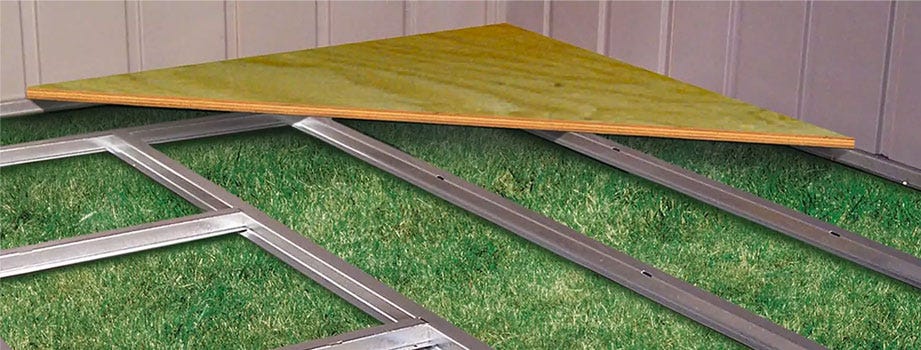
A floor frame is optional but recommended. Check out our floor frames here.
A temporary anchoring system should be in place every time you leave the assembly area – whether you break for one hour or several days.
A permanent anchoring system must be ready to be put in place as soon as your shed is fully assembled. Need anchors for your building? See our selection of anchors here.

Safety
Must wear work gloves and safety glasses
In addition, everyone should wear long sleeves
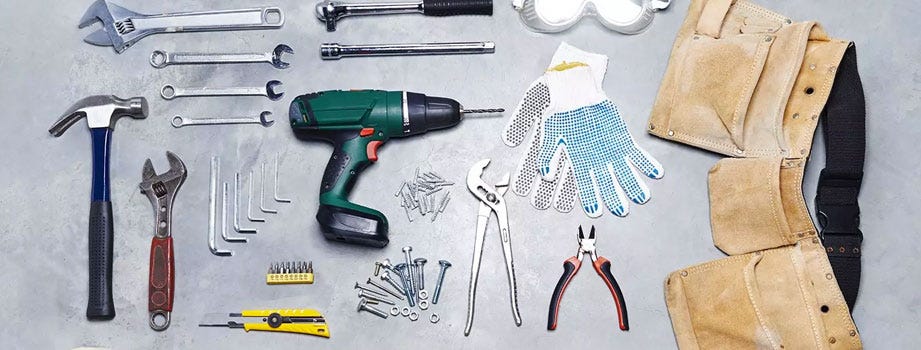
Basic Tools
MUST have No. 2 Phillips screwdriver; we strongly recommend one with a magnetic tip
Step ladder
Utility knife or scissors
Pliers
Carpenter’s level
Tape measure
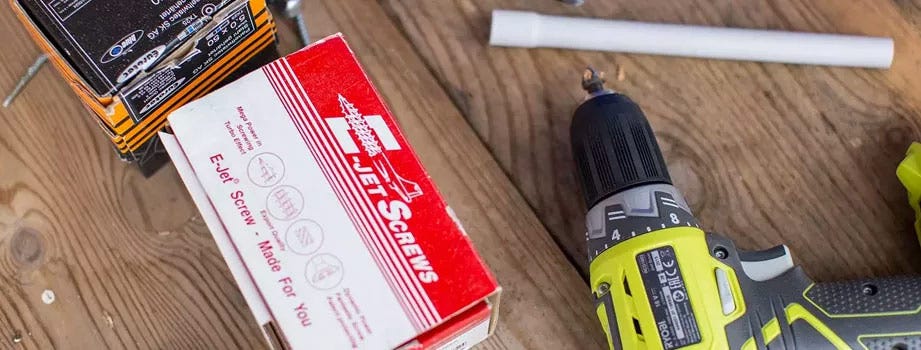
Optional Tools
Wrench/nut driver
Cordless screwdriver with magnetic tip (strongly recommended)
Extra battery for cordless screwdriver
Square
String (for measuring diagonals to square the frame; when the diagonals are of equal measure, the base is square)
Pre-Assembly
The first few steps in your instruction manual show how to join related parts to make the sub-assemblies. These assemblies can be completed in advance so that you can maximize your daylight hours on assembly day.
Assembly
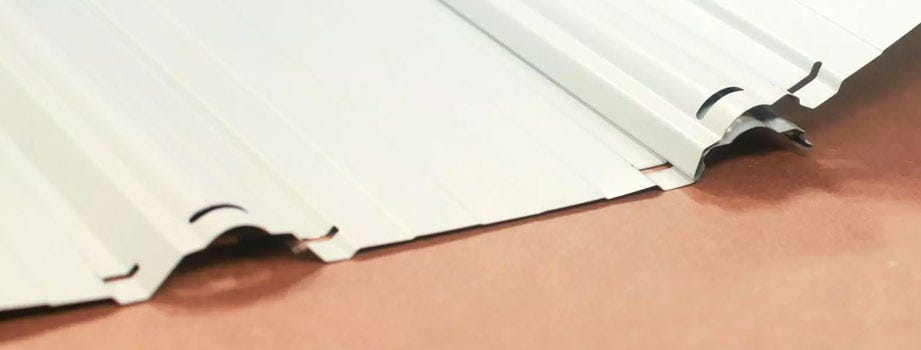
Take your time. Complete each step. All shed parts are numbered and pre-drilled for ease of assembly.
For their safety, keep children and pets away from your worksite.
Never concentrate your total weight on the roof. When using a stepladder, make sure it is fully open and on even ground before climbing on it.
Use weather-stripping where instructed during the assembly process. Make sure that the weather-stripping tape adheres to the panels. Do not stretch it. Apply it directly off the roll onto clean panels.
Make sure that all washers are used where instructed during the assembly process. Ensure that all washers are flush with the panels and do not over-tighten screws, as this can crack the washers.
If the weather changes and becomes rainy or windy, stop building and immediately temporarily anchor your shed for completion on a calm, clear day. Do this by securing the corners of the shed to your base and placing weights, such as patio blocks or sandbags, on the floor frame.
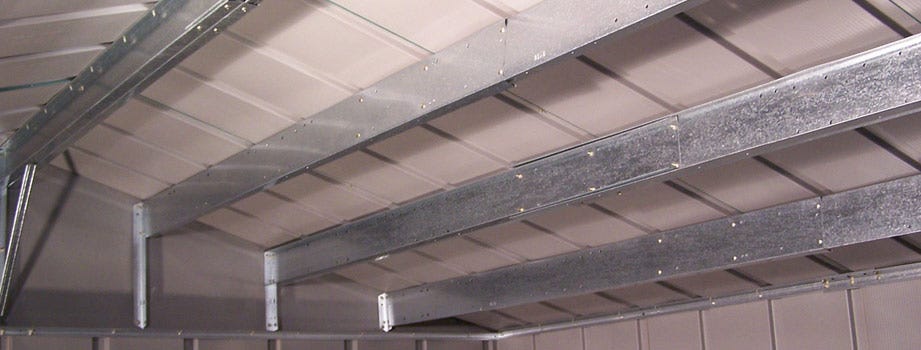
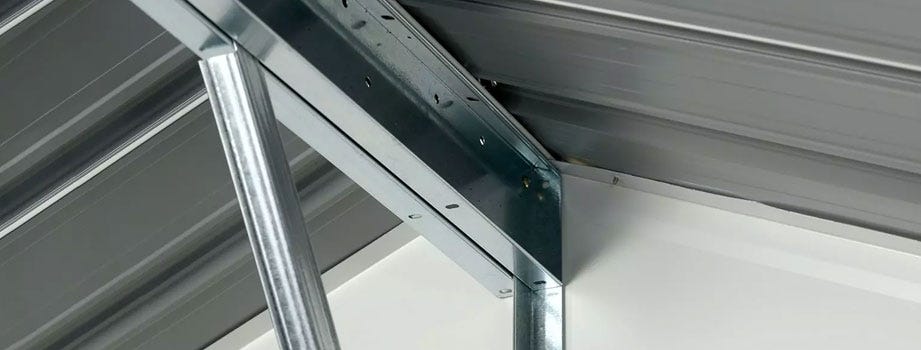
Note: If you live in a region that experiences snow accumulation, install our roof strengthening kit during assembly. If you wait till a later time, you will have to remove and then reattach the roof panels for proper installation.
Post-Assembly
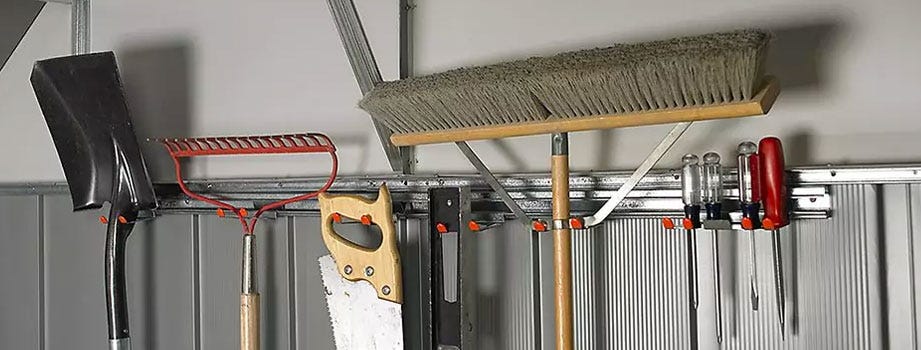
Add Arrow shelving and tool hanging racks. You can find these in our accessories section as well as organization tips in our blog.
Wash off inked part numbers on coated panels with soap and water.
Add silicone caulking for watertight seals at the washers and throughout the building.
Treat your clean shed with spray-on car wax and follow our care and maintenance tips to maximize shed life and maintain appearance.
Quick Assembly TIP
Recently Purchased An Arrow Product?
Here are some steps you should take to ensure your Arrow garage, carport or shed will be assembled safely and securely.
Step One:
Check With Your Local Ordinance
Although generally not an issue, you’ll want to with your local ordinances and zoning regulations to ensure you can legally put up your shed.
Choose Nice Weather
Check your weather to make sure that you’ll have good weather for the entirety of your build.
Give Yourself Enough Time
Building could take a while, so make it a weekend project and give yourself ample time to assemble your outdoor shed.
Plan To Build From Start To Finish
Try to finish once you’ve started your build – this will help you avoid confusion, complication and delay. You’ll be glad you did.
Step Two:
Choose A Large, Flat Area For Your Shed
A flat area that doesn’t have a lot of bumps, grooves, or hills makes an excellent assembly location.
PRO TIP: Don’t have an entirely flat surface to build your your shed? If the area where you want to assemble your shed is sloped, you may need to construct a support system on the downhill side of the site. You’ll want to build up support on the slope by using a sturdy and durable material like cement, cinderblock, or timber.
Measure Your Site For Extra Room
Make sure that the location you have chosen for your shed will allow the door to open fully and easily, without barriers that constrict movement or sidewalls you can hit and accidentally cause damage to your shed.
Choose A Site That Doesn’t Easily Flood
In inclement weather, flooding can occur on your property. To preserve your shed you’ll want to keep it dry so choose an area with good drainage.
Choose An Easy Spot To Work In
You don’t just want enough space for your shed – you want enough space to assemble it, too! Make sure to choose a location that allows enough working space for moving parts and easy fastening.
Step Three:
Two Is Better Than One
We recommend that two people tackle assembly and not just a single person. This will make assembly easier and faster – plus, who doesn’t like some company?
Create A Square And Level Foundation
Be sure to select a location where you can create a base that is square and level.
Choose Your Base
A square and level base is critical for a square and level shed. There are options suggested in the assembly instructions for building a good base. An Arrow base kit can help you create a square and level base.
PRO TIP: Don’t have an entirely flat surface to build your your shed? If the area where you want to assemble your shed is sloped, you may need to construct a support system on the downhill side of the site. You’ll want to build up support on the slope by using a sturdy and durable material like cement, cinderblock, or timber.
Floor
Thinking of building your shed directly on grass or dirt? We recommend installing a floor – this will keep items better protected. An Arrow floor frame kit can help you quickly create an excellent floor using 5/8-in. exterior grade plywood (wood not provided; match dimensions to your floor frame).
- 2 Phillips screwdriver
- Pliers
- Work gloves
- Safety glasses
- Utility knife or scissors
- Carpenter’s level
- Tape measure
- Stepladder
PRO TIP: Using a magnetic-tipped cordless screwdriver could speed up assembly time by 40%. If you use one, you may want to have an extra battery available.
Always Anchor Your Shed
No matter what product you’re assembling in your backyard, you’ll want to anchor it down permanently for safety and security reasons. At Arrow, we offer a variety of different anchoring options for different types of foundations; you can see these options here. If you need to leave your building before it is completely assembled, you will need to temporarily anchor the corners of the shed to your base, and place weights, such as patio blocks or sandbags, on top of the floor frame.
Read Your Instructions
Keep in mind these are basic recommended instructions. Before assembly, check the assembly instructions or product manual that came with your shed to ensure you have the proper equipment to start your build.